A place to call Home
#python
#build-a-blog
sina lukin e ni la, sina pona a!
Welcome back, I'm still working on my static site generator / blog. This time I'll try and fix my code blocks, and get a homepage with both of my posts on it done! Bonus points if I can make previous / next links in the articles themselves.
Code blocks
So with the default markdown converter in python, my Obsidian markdown got absolutely mangled. The back-tick syntax "```" wasn't recognised, so the contents of those code blocks were interpreted as real HTML, which was a disaster.
I had to first convert all of the HTML special symbols <>" into their safe counterparts < > ", then because of my neovim's automatic formatting, I had to manually position the white space in the blocks to look right in the final HTML.
As I said, disaster. I maybe could have worked out how to turn off my formatter temporarily, but I just wanted to finish and get something published. I'll just put a toggle-able auto-format on my todo-list when I rewrite my config next.
So I did a little research and found that pythons "markdown" package is not the same markdown as Obsidian! That explains a lot!

https://python-markdown.github.io/#Features
I found a python package for commonmark, and gave it a whirl.
<pre><code class="language-python">>>> import markdown
>>> markdown.markdown("# Hey Mum")
'<h1>Hey Mum</h1>'
>>>
</code></pre>
It's a thing of beauty.
So that was an easier problem than I thought to solve, this should require minimal cleanup for future articles.
A page to call home
I need to make a main page, that links to my other pages in some sort of list. In future builds, I'd like this page to be created automatically with a template, but for now I'm more than happy to hard code it.
Testing my pages locally by open the file itself also wouldn't cut it anymore. So I looked at what python could do to help out. And lo and behold, python has a one-liner that spins up a simple file based web server. I can now save the file, refresh and see my new page.
python3 -m http.server
So I moved my original article out of the way to create my new index.html.
I want this to be a fairly simple page, with a list of articles in the centre.
- Article title
- Publish date
- First couple of lines as a description
Which I wrote like this!
<!-- My previous article as a card -->
<article>
	<hgroup>
		<div class="grid">
			<h4>
				<a class="contrast" href="#">
					The start of my blog
				</a>
			</h4>
			<p class="to-end">26 Apr 2025</p>
		</div>
		<p>
			<small>
				As I'm starting to get older, I'm having more and more
				opinions about all sorts of things. And considering the
				stranglehold big tech companies have on social media, the
				best way I think to get my thoughts out there, will be
				my very own site! ...
			 </small>
		</p>
	</hgroup>
</article>
My first template
Right, I've been avoiding the big task for long enough. I gotta get some automation going. Doing this bit by bit isn't going to be worth the hassle.
I need to:
- Make a template for my pages
- Read markdown files from my
pagesdirectory - Put the output inside the template
- save it to the build folder
The template is the easiest part, I just need to save the html file I've already been using, and strip out everything inside of the <main> tag.
All the easy stuff is done. Let's write a serious python script
Build script
Before I write the build script, I know I'm going to want metadata for my articles. I don't want to rely on the file names in my repo to determine the url or publish date. So I'm adding front matter to my articles using the commonmark format like so.
---
title: "The start of my blog"
publish_date: 2025-04-26
is_published: true
slug: 'start-of-blog'
description: "As I'm starting to get older, I'm having more and more opinions..."
---
This way, I can put data in the markdown files themselves, and not have to worry about how I name my files in the repository.
With that done, it's time to write the script. Which I have done already! Here's how it works.
After importing everything I need, I make a clean slate for the build process. If I were a smarter man, I could do diffs to see what actually needs rebuilding, but the site is so small and building so fast, that it literally doesn't matter that I rebuild from scratch every time.
source_dir = "src"
build_dir = "build"

# Delete current build folder
os.system('rm -rf build')
# Make a new one
os.mkdir(build_dir)
Next, I copy over the static files. These contain all my css files and images, and if I add any javascript later, that'll go in here too.
# copy css and img directories to build
copy_dirs = ["css", "img"]
for dir in copy_dirs:
    copy_command = f"cp -r \"./{source_dir}/{dir}\" \"./{build_dir}/{dir}\""
    os.system(copy_command)
Now I load my templates. I've made template files for articles, and the home page and its links. I store them in a dictionary for easy access later. If I add more templates, it'd be good to make this into a loop, but for now it's fine.
template = {}
# Read template
with open('./src/templates/index-template.html', 'r') as file:
    template['index'] = file.read()
with open('./src/templates/page-template.html', 'r') as file:
    template['page'] = file.read()
with open('./src/templates/page-link.partial.html', 'r') as file:
    template['page-link'] = file.read()
Next is the meat of the operation, converting markdown articles into html. First we enter a loop with a glob. I took inspiration from this page here: Build Your Own Static Site Generator. Finding this page made me confident I could actually do this myself!
# A list of pages to save for the index page
pages = []

# Loop over glob of markdown files in 'pages' directory
for f in glob.iglob(f"{source_dir}/**/*.md"):
	# build page...
Then we open the file, and extract its front-matter and render its content.
    # Open markdown file
    with open(f, 'r') as file:
		# extract frontmatter and raw markdown
        metadata, raw = frontmatter.parse(file.read())
        # convert content to html
        content = commonmark.commonmark(raw)
Next, we check if the page is published. Most pages will be, but if I ever need to take something down quickly for editing, it's a nice little check to have. If is_published is false, then it skips the rest of the build for this page.
    # if the page is not published, don't include it in the build
    if not metadata['is_published']:
        continue
We add the metadata to the pages list for the homepage later.
    # Save metadata for index page later
    pages.append(metadata)
Add pick the filename and directory. This will be the URL for the page.
    # Create pathname for build dir
    slug = metadata['slug'] or os.path.splitext(os.path.basename(f))[0]

    destination = os.path.join(build_dir, slug + '.html')
Next, we begin to replace the template placeholders with actual content. First we replace the content, which is not part of the metadata, then we replace all relevant metadata tags.
    # copy template to new variable
    html = template['page']
    # replace the content template handle with the content from the html
    html = html.replace("{{ content }}", content)

    # replace the other handles
    html = template_replace(metadata, html)
I use a function there, template_replace(metadata, html). What it does, is loops through the metadata dictionary, and depending on type, replaces the placeholder with the metadata value. Dates are a little special, as I want them to be YYYY-MM-DD for nice programming reasons, but most people aren't used to reading dates like that. (Unless you're east-asian). So I check if the value is a date, and if so, pretty print a date using a long month (e.g. 04 May 2025), which is universally understandable. Boolean true false values, I skip because I'm only using that for the is_published variable at the moment, which doesn't belong inside templates!
def template_replace(metadata, template):
    result = template
    for key, value in metadata.items():
        print('metadata key - ', key, '; value - ', value)
        if isinstance(value, bool):
            print("It's a bool, don't replace anything!", value)
            continue
        if isinstance(value, datetime.date):
            print("It's a date!", value)
            value = value.strftime("%d %B %Y")
        else:
            print("It's not a date.", value)
        print('final value', value)
        result = result.replace(f"{{{{ {key} }}}}", value)
    return result
Finally for the article markdown file loop, I open a new file and write in the html content.
    with open(destination, 'w') as file:
        # write file
        file.write(html)

    print(f"file written to {destination}")
After all the articles have been built, I build my new homepage. First, I declare some useful variables.
# Create index page
html = template['index']
destination = os.path.join(build_dir, 'index.html')
content = ""
Then I loop through the metadata of all the pages we saved before, and using a home page link partial template, generate that articles link, and add it to the home pages content.
for page in pages:
    print('page - ', page)
    # Replace metadata handles
    link_html = template_replace(page, template['page-link'])
    # Add new link to index content
    content += link_html + "\n"
At long last, all we need to do now is replace the content placeholder with our list of links, and write the file to the index.html. Then we print that we finished, which is nice to know.
html = html.replace("{{ content }}", content)
with open(destination, 'w') as file:
    file.write(html)

print("finished successfully!")
And that's it! Writing this script had a few twists and turns, as I'm still learning python's quirks, but it was relatively simple to get working, and now I have a build script for my website!
Time to push it, and make cloudflare use it!
Building on cloudflare
The last thing I want to do, is have to run the build script on my local machine, push the results and have cloudflare look at the build folder. Yuck. That would be the source of so many headaches about "Why doesn't it show up on the website?"
I became a programmer because I'm lazy, and I want the computer to do the boring stuff for me! Thankfully, the cloudflare build system has python installed already, so all I should need to do, is point the build at my new python script, and everything should work!
Yeah that sounds about right. So obviously I need to install all of the libraries I'm using for the script.
I whipped up a quick bash script that should install all of my dependencies, then run my python script. Let's try again!
#!/usr/bin/env bash

# install packages
pip3 install commonmark
pip3 install python-frontmatter

# run python script
python3 build-blog.py
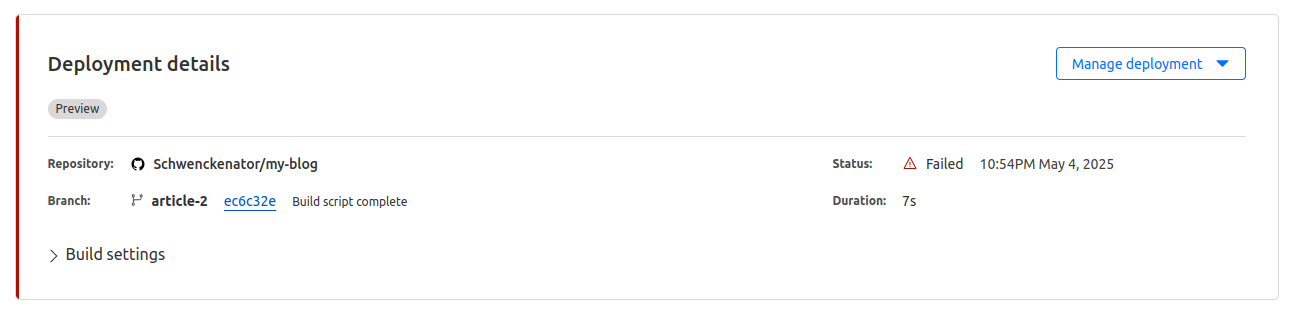
After some false starts, (not explicitly calling for bash in the cloudflare build command, installing the wrong frontmatter package), it works!
Closing thoughts
While this was not too difficult, it was still a pretty big step for this project. I've now got a homepage, both of my articles appearing on it, and links to those articles. The markdown now gets built automatically without needing manual cleanup, and inserted into my prepared templates.
And of course, cloudflare now runs my build script and builds my site for me too.
As for next steps, the bonus points I mentioned at the start would be nice, so people could read other articles without returning to the homepage. Then after that, I think I'll be able to put this down for a little bit, and work on something else, and write about that!
I hope anyone who read this far enjoyed my explanation!
Until next time,
pona tawa sina! mi tawa.